Running tests in containers with docker-compose
The main advantages of this way are to have independent environment for the tests running and to reduce the complexity of the test environment setup. Just load and run tests. Consider how to achieve this. #

You will see below how you can setup the docker-compose for common Ruby on Rails application. As a bonus, you will be able to reuse those setup on all projects without much changing.
What we want to achieve #
Running the tests should be easy. New developers should be able to join the development process without much trouble setting up the test environment. And it can become relatively complex including a set of integration with a bunch of additional services. For example, it requires a running Database.
Test runs should be isolated and repeatable. You don’t want to have that one flaky test that fails only on your machine. A failing test should fail when it’s run by anyone in the team and on CI as well.
Test environment should be as close to the production environment as possible. Having green system integration tests should guarantee that a feature works in production. As your application grows the number of service dependencies might grow as well, and it’s important to verify that integrations with them work correctly and keep the dependencies up to date.
Enter Docker #
Utilizing Docker to run tests can help you to solve these problems. All developers will have the same isolated test environment setup, which can be used for running tests on CI as well. New developers won’t need to spend half a day just to set up everything required to run tests.
Tests will be run inside a container, so you’ll need to define one. It’s done in a Dockerfile:
FROM cimg/ruby:2.7.1

ARG TINI_VERSION=v0.19.0

RUN sudo apt-get update -qq \
  && sudo apt-get install -yq --no-install-recommends \
      libxml2-dev libxslt-dev libtool pkg-config \
      libbz2-dev libglib2.0-dev libxml2-dev libxslt-dev cmake \
  && sudo apt-get clean \
  && sudo rm -rf /var/lib/apt/lists/* /tmp/* /var/tmp/* \
  && sudo truncate -s 0 /var/log/*log

ENV BUNDLE_JOBS=4 BUNDLE_RETRY=3

RUN gem update --system && gem install rake bundler --no-document

ADD https://github.com/krallin/tini/releases/download/${TINI_VERSION}/tini /usr/local/bin/tini
RUN sudo chmod a+x /usr/local/bin/tini

ENTRYPOINT ["/usr/local/bin/tini", "--"]
First, define the base image, we use the official CircleCI image here. Then install the required application dependencies and configure ownership and rights for files from mounted volumes (more on that later). In the end, define the tini entrypoint.
tini is a neat tool that helps to reap any zombie processes and forward signals to commands executed in the container.
Wiring up #
Running application tasks might require additional services dependencies. In this example, in order to run tests, the app needs an accessible database instance. It can be provided by utilizing the docker-compose.
version: "3.8"

services:
  app:
    build:
      context: .
      dockerfile: ./Dockerfile
    environment:
      DATABASE_URL: postgresql://root@db:5432/db_name
      DISABLE_SPRING: 1
      MALLOC_ARENA_MAX: 2
      PARALLEL_WORKERS: 1
      PGHOST: db
      PGUSER: root
      RAILS_ENV: ${RAILS_ENV:-test}
    networks:
      default:
    user: ${CURRENT_UID:?"Please run as follows 'CURRENT_UID=$(id -u):$(id -g) docker-compose up'"}

    volumes:
      - .:/home/circleci/project:cached
      - gems:/home/circleci/.rubygems
      - cache:/home/circleci/.cache

    depends_on:
      - db

  db:
    image: circleci/postgres:alpine
    restart: always
    environment:
      POSTGRES_USER: root
      POSTGRES_DB: db_name
    volumes:
      - pg:/var/lib/postgresql/data
volumes:
  gems:
  cache:
  pg:
Here we define two services: app and db. App service is built using the defined Dockerfile, all required environment variables are set here as well.
In the volumes section firstly the application directory is mounted, the rest volumes are added for caching purposes. Here also specified that app service depends on db service.
Please note that we specify the user for the app service and that user should be passed by the caller of the docker-compose command.
It’s done in order to solve the permissions problem, which can occur when processes need to modify files inside the mounted volumes, or when you’ll need to access the files (logs, screenshots, other artifacts) which were generated inside the container. To solve both these problems you need to pass your current user uid to the docker-compose commands.
The db service configuration consists of image name (provided by CircleCI), DB access credentials in environment variables, and volume to store the DB data.
Usage #
Docker and docker-compose do a lot of work to make life easier for developers now, but it’s still a lot to remember and type:
    export CURRENT_UID=$(id -u):$(id -g)

    docker-compose up --remove-orphans -d db

    docker-compose build app

    docker-compose run app bin/bundle install

    docker-compose run app bin/rails db:prepare

    docker-compose run app bin/rails bin/rails db:schema:load

    docker-compose run app bin/rspec
All these can be extracted into a few utility scripts:
#!/usr/bin/env bash

echo "=>  Install dependencies"
bin/bundle install

echo "=>  Prepare DB"
bin/rails db:prepare
bin/rails db:schema:load
#!/usr/bin/env bash

echo "=>  Build"

export CURRENT_UID=$(id -u):$(id -g)

docker-compose up --remove-orphans -d db
docker-compose build app

echo "=>  Setup"
docker-compose run app bin/ci-setup
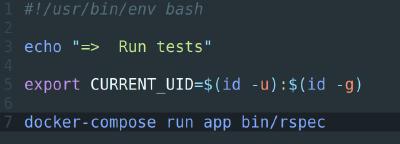
#!/usr/bin/env bash

echo "=>  Run tests"

export CURRENT_UID=$(id -u):$(id -g)

docker-compose run app bin/rspec
Now setting up and running tests inside a docker container is achieved by only running:
    bin/dc-setup

    bin/dc-test
Docker is a powerful tool to use in your development process. It can make starting and switching between projects fast and easy, and help to ensure that everyone is staying up to date with the technologies being used.
Dmitry Tsvetkov is a Software Engineer at JetThoughts. Follow him on LinkedIn or GitHub .
If you enjoyed this story, we recommend reading our latest tech stories and trending tech stories .